Planning Overview
Change Basic Plan Information
Viewing Event Detail
Communication Tools
Setting Event Status
Set Dates
Saving Your Event
Registration
Set Up Reminder Emails
Add Content
Lectionary Semi-Continuous Lessons
One-time Event
Adding Content to Rotation Events
Add Groups
Planning Overview
There are three tabs beneath the Event List on the Event Planning page: Set Dates, Add Content, and Add Groups.
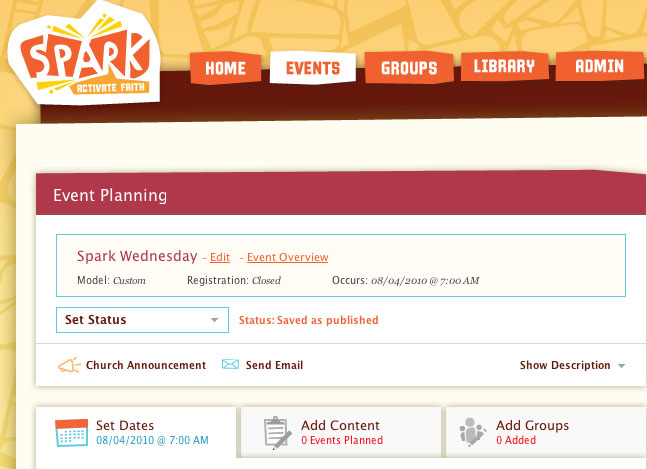
Each tab contains an important step in creating a One-Time or Recurring Event. When you take action on each step, the words below the tab label will change from red to blue to signal to you that you’ve previously worked on or completed that step.
Back to Top
Change Basic Plan Information
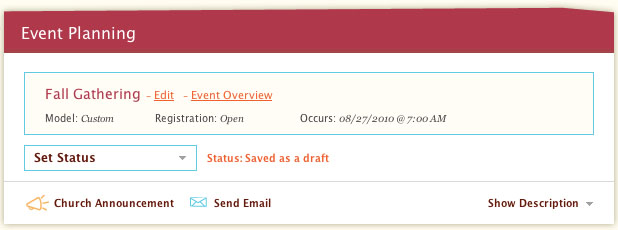
Directly below the Event Planning banner, you will find all the basic information about your One-Time Event or Recurring Event.
- To edit the event’s basic information such as Title and Description, click on the edit link in the event header.
- Enter the event title and description
Viewing Event Detail
As a Director, to see the Event Detail page for an event within a recurrence, click on the Event Overview link in the Event header.
See the
Event Detail article for more information.
When Leaders and Parents click on an event on the Events page, they will navigate directly to the Event Detail page, because those site access roles do not have access to the Event Editing or Planning pages.
Back to Top
Communication Tools
To create a new announcement, click on the megaphone icon. For more on announcements, see the
Church Announcements article.
Click on the envelope icon to send a message. The email To: field will be auto-populated with your event attendees. For more on sending email from Spark Online, see the
Message Center article.
Back to Top
Setting Event Status
Event status is a very important task when building your event.
- When you first create an event, the event will save with a status of “Draft”.
- Once the event planning is complete, change the event status to “Published” to make the event public.
- If you have elected to send email reminders on the Set Dates tab, those messages will release as scheduled. (See the Set Up Reminder Emails section for more information.)
- If you elect to open the event for registration, the event will appear in the Register for Events panel on Leader and Parent home pages.

Back to Top
Set Dates
Under the Set Dates tab, you can enter important information about your event:
- Date(s) and exception dates of the event must be entered first. This means you can create events without publishing or opening them until a later date.
The following information can be entered in any order:
Saving Your Event
To plan your Event, you can complete three main tasks: Set Dates, Add Content, and Add People and/or Groups.
- Save your Event after filling out or changing information on the Set Dates tab.
- You do not need to save your Event after entering or changing information in the Add Content or Add Group tabs, because all actions done on these tabs save automatically and instantaneously.
- For more information on entering Event information, see the sections on
Setting the Rotation Schedule
If your church subscribes to Spark Rotation content, and if you selected Rotation as the model type on the Create Event page, then in addition to the Announcements and Email icons in the event header, you will also have an icon for setting the Rotation schedule.
- Select your Rotation story, workshops and groups
- Click on “Set Rotation Schedule” Spark Online will pre-populate a Rotation schedule for you.
For more information on Rotation schedules, see the Manage Rotation Schedule article.
Back to Top
Registration
Directors can manage registration of leaders and kids via Spark Online, using the Registration setting. If you leave the Registration setting to "Closed," it means that you, the Director, will be handling registration yourself, through Spark Online. If you change the Registration setting to "Required," leaders and parents can register themselves for an event; the Director only has to put the registered people into the right groups. Events with "Required" registration appear on everyone's Spark Online Home page, where they can click through to register themselves or any Family Member with just a few clicks.
- To make online Registration required:
- Click "Edit" for the selected Event under the Set Dates tab
- Select "Required" in the Registration field
- Directors can make Registration required at any time
When you save your event(s) to the calendar, it will be highlighted on the Leader and Parent home pages. - Put your church’s Spark website address in your usual communications to Leaders and Parents.
- Once someone has registered for the event(s), you’ll be alerted the next time you sign into the site.
- Once Registration is required, directors can wait to organize registrants until closer to a program's start date.
Set Exception Dates
In addition to basic scheduling, Spark Online also gives you the ability to set Recurrence Exception Dates.
Examples:- No Event Scheduled: Thanksgiving weekend we do not have Sunday School
- Non-Spark or Special Sunday:The first Sunday in December is Christmas pageant practice instead of Sunday school.
(Be sure to create a One-Time event for exceptions you make for special dates—this will allow you to provide more information about the special activities to Leaders and Parents.If you would like participants to be able to register for the event, don’t forget to set Registration to “Required” on the Set Dates tab.)
Tip:
Click Here to download "How to Use Spark Online for Program Registration".
Set Up Reminder Emails
- When Reminder Emails are set up, Spark Online will send your event Leaders (for Classroom, Lectionary and Rotation model events) or all your event participants (for one-time “Other” model events) reminders prior to the event.
- The email contains the basic event information, the recipient’s role in the event, the group s/he is assigned to lead, and a link to the Spark Online page where s/he can watch the prep video and download materials.
- If the recipient replies to the email, the reply message will be sent to the inbox of the person who created the event.
- This tool ensures that event Leaders not only have easy access to their materials, but also that they are reminded of their participation commitment with enough time to prepare.
Back to Top
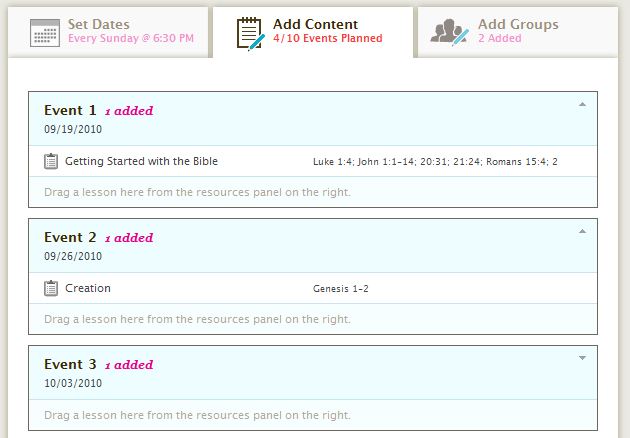
Add Content
- Under the Add Content tab, drag lessons and stories from the recommended Spark Scope and Sequences onto the date(s) of your event.
- To preview a resource, click the magnifying glass to the right of the Bible verse under the "Resources for this Event" banner.
- To remove a resource, click the red X to the right of the Bible verse under the "Resources for this Event" banner.
Tip: For more information, see Drag and Drop and Resources panel articles.
Tip:
Click Here to download instructions on downloading content for planned events.
Lectionary Semi-Continuous Lessons
During certain times during the Lectionary year churches have options for which readings to use in the Sunday worship service. Most churches use the “thematic” option, but sometimes churches opt to use what is called the “semi-continuous” option. When planning a Spark Lectionary event or recurring event, content will auto-populate for each week, according to the Lectionary readings. For weeks in which there is a semi-continuous option, an asterisk will appear next to the lesson name. If your church is using the semi-continuous reading in worship that week and you would like to use the semi-continuous lesson content, follow the steps below (if you don’t know if your church uses the semi-continuous readings, the person responsible for worship planning at your church should be able to help):
- On the Set Dates tab, check that particular day as an exception date. Save the change.
- Click on the Events tab and find your Lectionary event in the event list. Click the “copy” action button to create a one-time event with just the People and Groups from your Lectionary event.
- Change the model to “Other”.
- On the Event Planning page, on the Content Tab, find the appropriate semi-continuous story in the Resources panel and add it to your plan.
Back to Top
One-Time Event with an “Other” Model
If you are planning a One-Time Event, add any content from the Spark Online library and any files uploaded by your church. This flexibility is unique to one-time “Other” model events. (In other words, files uploaded by your church only be added to One-Time Events or as content in a Rotation Custom Workshop.)
Back to Top
Adding Content to Rotation Events
Adding content to a Rotation event has two steps. First, drag the name of the story from the Resources panel on the right-hand side of the Content tab. (Only one Rotation story can exist for a single recurring event. For tips on scheduling multiple Rotation recurring events efficiently, see Copy Event.)
A blue “Choose Workshops” button will appear.
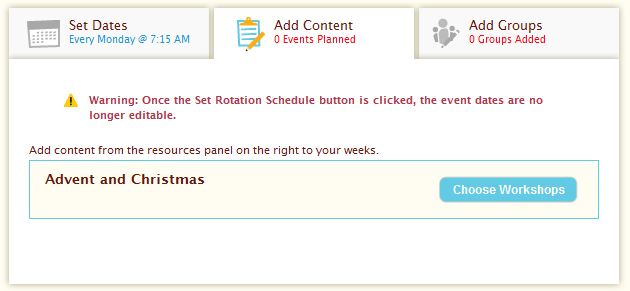
When clicked, the Content tab will refresh, and a list of Spark Rotation Workshops will appear. If you will not be doing one of the workshops during the Rotation for your selected story, click on the “X” action button on the workshop line. If you need to add additional workshops or custom workshops, click on the line at the bottom of the page.
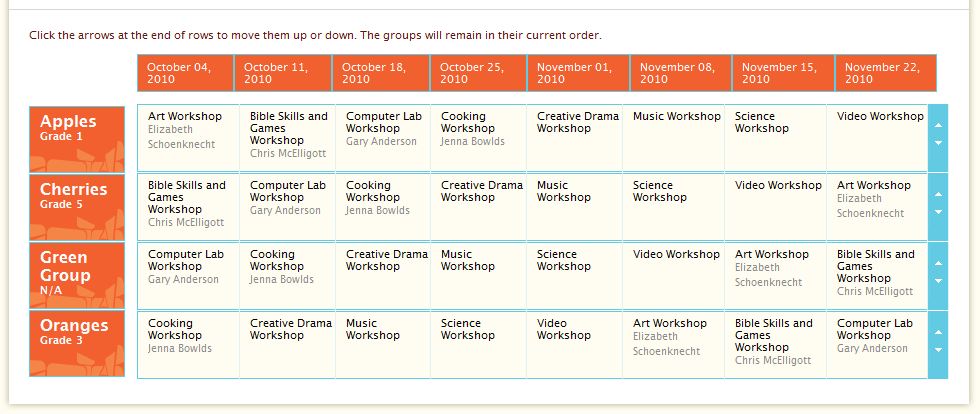
Tip: For Rotation recurring events, having the same number of weeks, groups, and workshops ensures that all of your groups will rotate through all of the workshops. If the number of groups and workshops are the same, but differ from the number of weeks, then your groups will either do one workshop twice, or disregard one workshop in full.
Once you are done deleting unnecessary workshops and adding additional or custom workshops, add workshop Leaders by dragging their names from the Resources panel on the right. This will ensure that the workshop content is delivered to your workshop Leaders. For more information on how to add Leaders to events, see Drag and Drop.
Click “Save and Return” to go back to the story selection page of the Content tab, or click on the Rotation Schedule icon to view or manage how your groups move from workshop to workshop over the course of your recurring event.
 Back to Top
Add Groups
By dragging a group from the Resources panel into an age level, you are indicating that the members of the group will be participating in the event(s) (for more information see Drag and Drop and Resources Panel articles).This action also ensures that once the event is saved to the calendar, the Leader of the group will receive the teaching materials for that age-level (saving to the calendar is a separate step, for more on this see Setting Event Status). This was made to be flexible so that churches can assign age-level content to groups as they see fit. If you do not need content for a specific age-level, do not put groups in that age-level.
One-Room Sunday school and Groups that Need Multiple Age-Levels of Content
If you have a group that includes kids from multiple age-levels, simply put the group in more than one age-level. This will ensure that the Leader is able to view and download all age-appropriate lesson content for the group.
Back to Top
Adding Groups to a Rotation Event
Adding groups to Rotation events is slightly different than adding groups to Classroom or Lectionary model events. All Rotation Shepherds (group Leaders) receive the same content. For that reason, groups do not need to be put into age-levels.
Tip: For Rotation recurring events, having the same number of weeks, groups, and workshops ensures that all of your groups will rotate through all of the workshops. If the number of groups and workshops are the same, but differ from the number of weeks, then your groups will either do one workshop twice, or not do one of the workshops at all.
Back to Top
Adding People and Groups to a One-Time “Other” Event
Events with an “Other” model allow Directors to select both people and groups from the Resources panel. Unlike Classroom or Lectionary planning, people and groups do not need to be put into content age-levels. All participants will receive Event Reminders and will be able to download event content.
Related Articles:
Spark Online Basics
Home
Events
Event Detail
Event Overview
Create a One-Time or Recurring Event
Group Management for an Event
Add Group Members
Library
Admin
Message Center
Spark Online Director Role
Edit an Event